Monday 20 February 2017

Methi Mutter Pulav


I love to make one pot meals.. it means less work while cooking and after cooking too.  That too on weekends if I don’t have many vessels dropped in the sink, lot of time will be saved for rest of the things.

My usual one pot meals are biryani / pulav / bisebelabath.  Other mixed rice varieties are too simple for weekend meal. So mixed rice will be mostly on weekdays.

I make variety of pulav based on available / seasonal ingredients.

We get very fresh green peas and Methi this season. So the pulav is based on that. I almost used green peas daily; my daughter takes a run hearing the name. J But I never leave it.

The ingredients can be totally altered based on your preference.  

Ingredients:

  • Basmati Rice – 2 cups
  • Water – 4 cups
  • Fresh Green peas – ½ cup. (If you are using dried peas, soak in water for an hour)
  • Methi  leaves – 2 small bunch (washed and roughly chopped)
  • Onion – Medium sized – thinly sliced
  • Ginger + Garlic + Chili paste – 1 tbsp
  • Spices – (2 -cardamom, 2 - bay leaves,  2  - Cloves, kuskus – ¼ tsp, 1 inch Cinnamon stick, Fennel seeds – 1 tsp)
  • Butter – 2 to 3 tbsp
  • Oil - 1 tbsp
  • Lemon juice – 1 tsp. ( about half a lime I used)
  • Salt to taste

Preparation:

Wash and soak Basmati rice for half an hour.  Meanwhile we can make the other stuff ready, so that the timing will be correct.


Chop off the roots from the methi leaves, rinse well in water, roughly chopped. Usally there will be lot of mud in that, so rinse well.

Cut the onions into thin slices.

Grind 1-2 green chilies + 5 pods of garlic + 1 inch piece ginger into smooth paste.

Method:

In a pressure cooker, add a tbsp of butter and a tsp of oil.

Add the spices mentioned. Fry for a min in medium flame.


Add the ginger – Garlic – chili paste.  Fry it in low flame. In higher flame it might get burnt.

Add the onion, fry it. Need not wait till it browns.


Add the peas and methi and fry 1-2 mins.


Add 4 cups of water. 1:2 rice water ratio works for me. I have taken 2 cups of rice, so 4 cups of water. Mix it well.

Let the water boil well. 


Add the salt and mix well.

Drain the rice to remove excess water and add to the boiling water.


Add a tbsp of butter. Mix it well. Let the mixture start boil for a minute or two.

Close the lid and and put on the weight and cook for 15 mins in LOW flame.


No need to wait for the whistle. Once the pressure is released, add a tsp of lime juice and a tbsp butter to enhance the taste.


Mix gently.

Serve hot with raita or curd.

Making video .. below.


Note : Also adding methi will not give any bitter taste to the pulav. It will be very tasty


Monday 13 February 2017

Appam


I never miss the opportunity of eating appam and kadalakari whenever I visit kerala. Even in kumarokam restaurant that’s my first choice. I love the pillowy soft appam and a spicy curry to go with it. Sometimes the plain coconut milk with some sugar and a hint of cardamom is soothing too.
When I was living in adambakkam, there was a place I occasionally buy readymade appam batter from a shop. So I never had a chance to make the batter at home. Now that we have relocated to different place, i have to prepare from scratch.
This weekend special was appam and veg stew. My daughter Lakshmi loved it. What more a mother want?
I referred the recipe from Kothiyavunnu blog.
Ingredients for appam batter:
  • Raw rice  - 4 cups
  • Fenugreek seeds – ¼ tsp
  • Cooked rice – 1 to 2 cups
  • Grated coconut – 1 cup
  • Salt to taste.
  • Active dry Yeast – 1 tsp
  • Sugar – 1 tsp
Method :
Wash and Soak the raw rice and fenugreek seeds for atleast 2 hrs.


Drain the water, grind it along with the cooked rice and grated coconut adding water little by little.


Grind it into smooth paste for about 15 mins in the wet grinder. It resembles much like dosa batter. Collect the batter in a vessel. The vessel should be large enough, because after fermentation the batter will rise considerably.


Now we have to prepare the yeast solution. Few months before I was very afraid to handle the yeast, because we had no idea about it growing up in sambar sadham eating family.
Buy a packet of Active dry yeast. It is available in many super markets. We can use and store it back  in the refrigerator. So no worries. That was another concern for me.
Take warm water in a small bowl. Warm water is required for the yeast to get activated.  If it is hot, it kills the yeast. So make sure it is warm.


In the warm water, add a tsp of yeast and sugar and give a mix.


Keep it in the kitchen counter without disturbing for 15 mins. Now the bubbles will form and yeast will be activated.


Add the mixture to the batter and mix the batter well.

Now the batter has to ferment for about 8 hours in the room temperature. Overnight would be fine.
While you plan to make appam, add the salt. This will prevent from too much fermentation.
The batter can be stored in the refrigerator for about 3 days.
Now we will see how to make the appams.
Heat the appa kadai, grease it with lil oil. A drop of oil is enough.
Pour a ladle of batter in the centre and swirl the appa chatti.


Then close it with the lid. Cook in the high flame. till the centre of the appam gets completely cooked. It takes less than a minute to cook one appam.
The appam comes out of the kadai without any effort. It means the batter is perfect. If it sticks then there is something wrong with the batter or try it grease it better.

Below video explains the method
Non stick Appa kadai with the handle is available in the markets and easy to handle. But I use the normal iron one without handle. That works super good for me.
Enjoy the appam with veg stew / coconut milk / or some spicy curry. Appam with egg curry is a classic combo J.


Saturday 4 February 2017

Strawberry Preserve


Due to so much of time constraints and other commitments (read as Mommy commitment),  I am not finding time for my blog at all. I have to manage my time better and start posting frequently. I miss me and blog.

I bought a box of strawberries to make milk shake mainly as my daughter is so much fond of strawberry milkshake.  Suddenly she had fever so we had to drop the milk shake plan. To save those strawberries which don’t stay much long even in fridge in Chennai climate, I thought of preserving it. 

Fairly simple recipe.

Basic preserves are just the fruit and sugar, for a good punch I added ginger. I would say that is the highlight of this recipe.  Without ginger I wouldn’t much love this sugary jam. So I strongly advise to add ginger in this.

Ingredients:
  • Strawberries roughly chopped – 1 cup
  • Sugar – ½ cup.. or even lil less
  • Ginger – grated – 1.5 tsp
  • Lemon juice – 1 tsp

Method:
Roughly chop the strawberries. Grate the ginger.


In a nonstick pan,  add the chopped strawberries, sugar, ginger and lemon juice and cook in medium flame.

Stir continuously. Initially the mixture becomes watery and starts combining together.


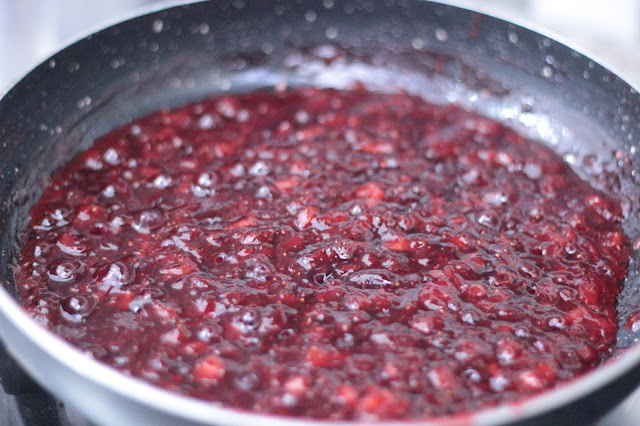
Simmer it and keep stirring for about 10 – 12  mins. The mixture now becomes glossy.


Switch off the stove. Once cooled, store in a clean dry jar.

It should stay well for 10 days if refrigerated. May be more days too. But ours finish too fast, so I am not able to measure shelf life.

Tadaa.. our preserve is ready. Enjoy.


Related Posts Plugin for WordPress, Blogger...